Sunday, January 31, 2016

DME 2nd Hand Diesels: 2nd Gen Joins the Roster

This week a 2nd Gen EMD joined my DM&E roster. Received as an undercoated Kato SD40-2, I went right to work on it getting ready to replicate the 6360 City of Mankato.

I started by grinding away the inside of the shell behind the radiator grilles. This is a model car trick to open up the radiator grille, and worked really well here. There was quite a lot of meat on this part of the shell so it should still be plenty strong. Why am I cutting the radiator grille open? Sound of course! I've got an MRC 1806 decoder on order, and the way the shell is designed girding open the radiator grilles to let the sound out made logical sense.


For paint I headed back to the acrylic craft paint aisle and came back with some Craft Smart Dark Yellow and Bright Blue. DM&E used several different shades of blue and gold over the years, these two struck me as close enough for the look of 6360 after a few years of service.

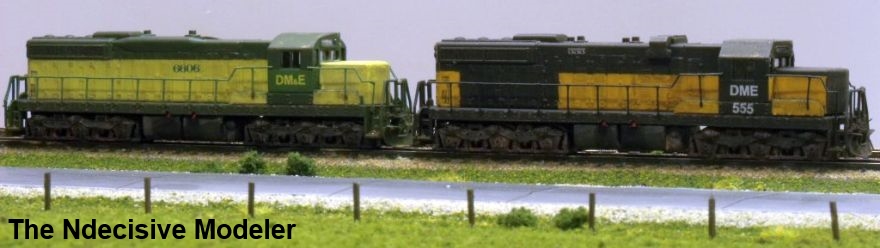
Here is the City of Mankato with it's running mates, all waiting for decals, decoders, and dirt.


Wednesday, January 27, 2016

Farm Site: Lights and Stuff

A mock up of the farm site scene tonight, lighting finished in the farm house, the shop, and on the yard light pole.

Here is a cutaway of the house showing how the upstairs bedroom is lit, the kitchen on the back of the house is done similarly. All of the fiber optic pipes are bundled together under the house and epoxied to a warm white LED. I plan to use a 5v lighting bus, so a 100Ω resistor is wired in series with each LED. A hole was drilled in the lens of the LED to help gather the light pipes and hold them in. I also wrapped aluminum foil around the LED to block light from leaking out the sides and hopefully reflect more of it down the pipes. The pipes themselves are painted black to block light from escaping and hide them inside the house. The shop is lit similarly with light pipes and a cool white LED.


 The yard light is a warm white SMD LED chopped off a holiday light set that had very fine enamel coated wire attached and a gob of glue for a lens. I trimmed the enamel wire on one lead very short and soldered it to a brass rod, the other lead was super glued down the length of the rod to simulate a mounting arm and conduit on the pole. Wires were then added to the bottom of the conduit and the pole for connecting to the 5v bus. I painted the lens of the LED with transparent orange paint to give it a high pressure sodium look, then painted the rest of the LED glue blob black to block unnecessary light out the top and sides. The pole will be painted brown and the conduit gray.


I planted all the buildings and some trees to mock up the scene and draw some guide lines for the driveway and outlines of each building. Since it was all in place I wired up the lights to a power source and was more than pleased with the result!


Sunday, January 17, 2016

Farm Site: Farm House Remodel

Originally I had planed for this module to be just a driveway and bins, the house having been torn down years ago. This Bachmann farm house is somewhat special to me, I've had it since I was a kid with a train set. When I rediscovered it in a box of old train stuff I had to use it.


It's a pre-built, and the build quality is ok but it is a bit of a fixer upper. It was pretty easy to take apart, there was very little glue. Most of the joints were just heat melted together.


While it is apart I've started installing lights. I wanted a yard light on a post for this module, it only makes sense to add a couple of porch lights and a few lights on inside the house too. There is one warm white LED swiped from a string of Christmas lights under the house with fiber optic light pipes from www.thefiberopticstore.com. There is a hole drilled in the LED and all the light pipes are stuck together and shoved in the hole. I have a little more work to do with it but so far it is turning out well.

Sunday, January 3, 2016

End of the Bean Field, Begin the Farm Site

I "finished" the bean field this week. By finished, I mean added a fence and road markings. I'm sure there will be other little bits added now and then but I'm calling this done for all intensive purposes.

The fence was made using Micheal Whiteman's method, simple posts with no actual fence. I used HO 3x3 strip wood painted with Americana Asphaltum brown craft paint and planted them just like Micheal describes in the nscale.net post.

Road markings were done with Sharpie Oil Paint Pens in Yellow and White. These were the ultra-fine variant and I could not be more pleased with the result. Using a straight edge for a guide I zipped two white lines and a yellow center line in about 30 seconds. Then I added some cracks with a black ultra-fine Sharpie marker. I'll be getting a black oil paint pen because I really really like the way the yellow and white worked, and the permanent ink has a weird purple sheen in some light.


I also started working on the base for a second module, the Farm Site. I picked up a couple Rix grain bins from a friend on nscale.net and a Woodland Scenics Trees learning kit from the hobby shop old as well as a Deluxe Innovations shed. I also plan to recycle a Bachmann farm house that was part of my first N scale layout when I was around 10 years. This module is going to take quite a lot of time I suspect because of the number of features, the house, bins, trees, etc. I'm hoping to light the house and shed, and also install a post light to illuminate the driveway. Just how to go about that remains to be figured out. These two modules should complement each other well, and can be arranged in any order.